

How To Repair Ethernet Cable Clip
Introduction
This guide volition embrace removing a damaged RJ-45 connector from an Ethernet cable and the steps to replacing information technology with a new one using the T568B standard. This requires a wire cutter/stripper/crimper tool and an RJ-45 connector.
-
-
First let's identify which side of the tool performs which functions.
-
Ane side of the tool is used for stripping wires. You can tell because it has two blades, one on each side, equally indicated in the first photograph.
-
The other side is used for cutting wires. You can tell because 1 side is bladed while the other is apartment, as seen in the second photo.
-
-
-
Place the wire across the blade of the wire cutter.
-
Squeeze the handles of the tool together until the wire is cut.
-
When yous are done with this step, the cable volition appear equally it does in the second photo.
-
-
-
Identify virtually a quarter of an inch of the cable into the stripping end of the tool.
-
Squeeze the handles of the tools together until the tool clicks and then release.
-
Pull the stripped wire comprehend from the cablevision with your fingers.
-
Annotation: If your wire cutter does not have a side specifically for stripping wires, you can simply utilise the wire cutting role but do not clasp the handles all the way down, so that information technology only cuts the outer casing of the cable.
-
When you lot have successfully completed this step, the cable should appear similar to the second photo of this step.
-
-
-
Organize the wires in the proper social club.
-
This society is: Orange-white, Orange, Green-white, Blue, Blue-White, Green, Brown-white, Chocolate-brown.
-
Hold these wires closely together and use the wire cutter to cut the very end of these wires off, to brand them all even in length.
-
-
-
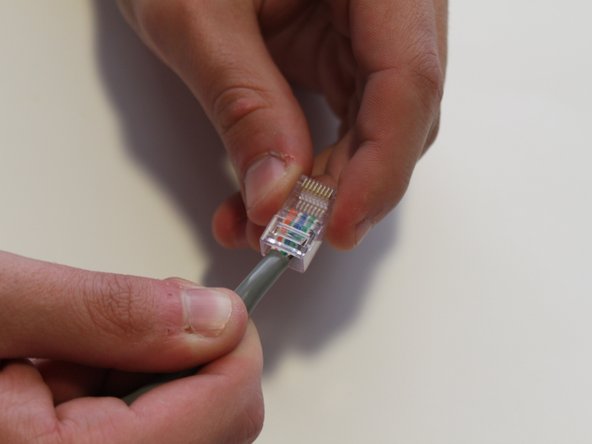
Agree the wires closely together in the order shown in the previous pace and push them into the new RJ-45 connector, with the clip end of the connector facing down, and the orange/white wire to the left.
-
Button the wires to the end of the connector ensuring that all wires enter their respective chambers in the connector.
-
If y'all inspect the summit of the connector you should be able to run across the tips of the wires pushed against the end of the connector, every bit shown in the second photo in this footstep.
-
-
-
Place the RJ-45 into the crimper at the end of the tool. Push button it in all the way, it will fit exactly in the tool—you can not push it in too far.
-
Squeeze the handles of the tool together until it clicks and releases.
-


Conclusion
You lot have now replaced the RJ-45 connector, y'all may test the prepare by using the cable. If it does not piece of work, you can always follow the steps in this guide to attempt again.
Embed this guide
Choose a size and copy the code below to embed this guide as a small widget on your site / forum.
Preview

Source: https://www.ifixit.com/Guide/Ethernet+Cable+RJ-45+Connector+Replacement/62127
Posted by: leglerhenceld.blogspot.com
0 Response to "How To Repair Ethernet Cable Clip"
Post a Comment